

FASTFOOT® COMMERCIAL
Edging Installation Guide
Fastfoot® Edging is a cost effective, green forming method for large footings and pads.
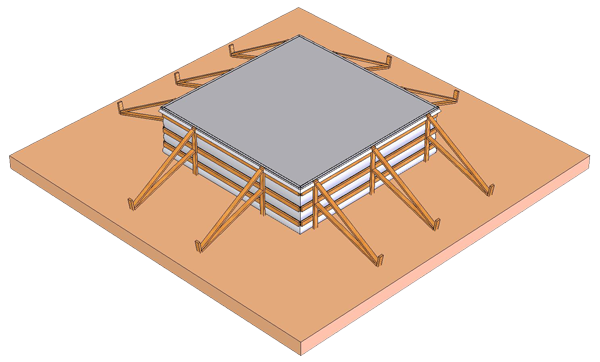
The support structure ('fence') for the fabric consists of 2x4 posts (stakes) spaced approximately 4 to 6' on center with horizontal members ('rails') attached to the inside of these posts.
The top rail ('screed board', usually a 2x8), is attached at the height of the top of the footing. If the distance between the ground and the bottom of the screed board is greater than 16", an additional rail (sized 2x4 or 2x6) is added to reduce the bulge and fabric tension. Footings 3' and over should have two rails in addition to the screed board.
While there is no limit to the height of the pads, for heights greater than 4', contact Fab-Form to ensure adequate bracing is used.
For regular strip footings, click here.
Fabric Tension and Concrete
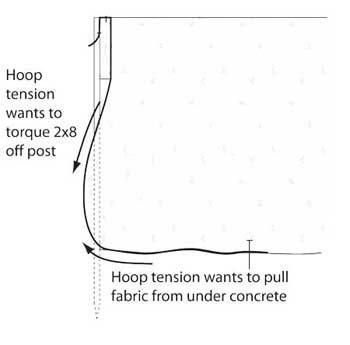
When concrete is placed inside the fabric-covered fence, 'hoop' tension is induced in the fabric which pulls down on the screed board and pulls the bottom edge from under the concrete. The screed board must be solidly attached to each post and sufficient fabric placed under the concrete to prevent slippage.
Lateral forces in rigid forms are up to 50% higher than with Fastfoot®, often leading to failure.
With Fastfoot® the pressures at the bottom of the form are taken by the friction of the fabric under the concrete.
Tools & Supplies
- Sharp scissors to cut Fastfoot®;
- Hammer tacker with 3/8" staples;
- 2x8 for the screed boards;
- 2x4s for posts (plus metal stakes when ground is too hard to penetrate);
- 2x4s for kickers and intermediate supports;
- Metal strapping and/or strap hinges to reinforce corners;
- Sledge or electric hammer to drive stakes;
- Nails and/or screws for joining lumber;
- Laser or builder's level for setting height on screed board.
 Posts are driven around the perimeter 4' to 6' on center.
 2x8s for screed boards are cut to length.
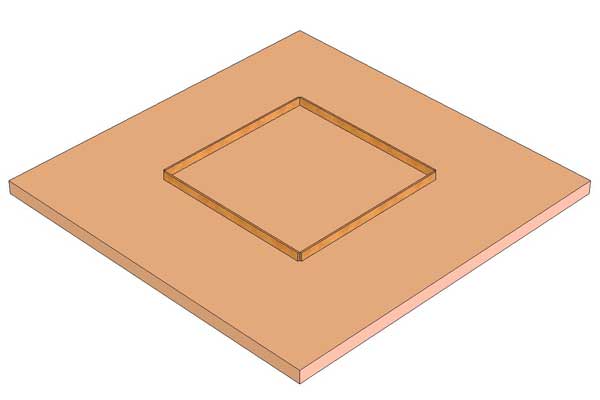 Four 2x8s are laid out in position around the perimeter.
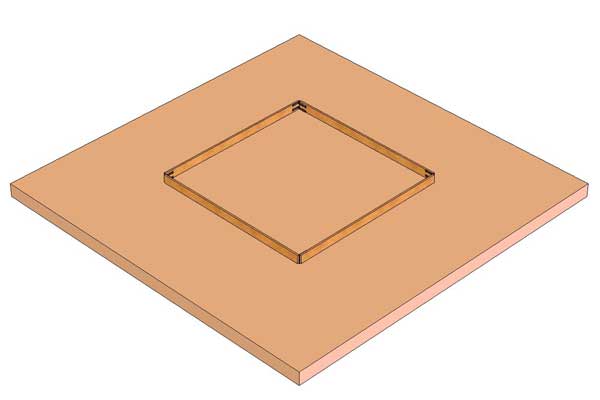 Corners are nailed or screwed together, metal strapping added for reinforcement.
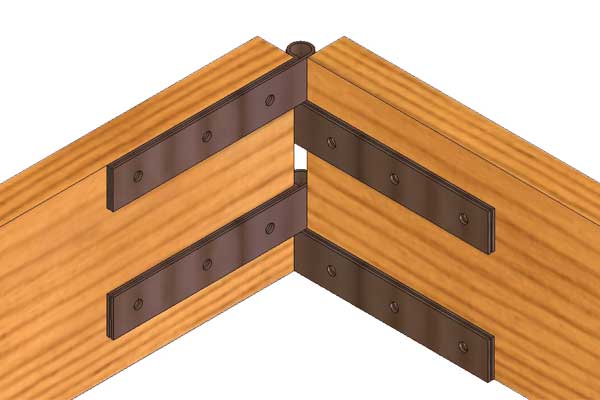 Strap hinges are ideal when reusing formwork. A removable rebar pin is used.
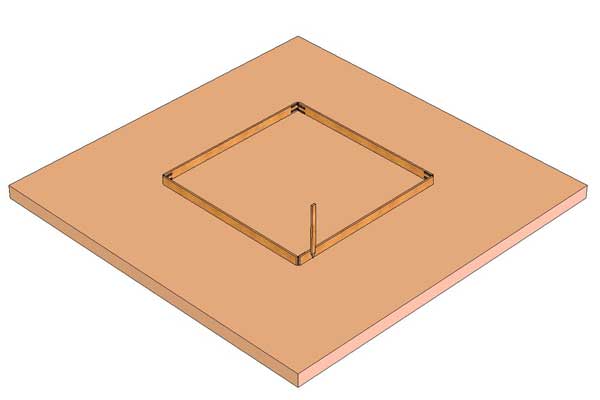 Use the assembled screed board as a template for the 2x4 posts.
- Posts are driven around the perimeter 4' to 6' on center.
Build Screed Board Perimeter
Cut 2x8s to length to achieve dimensions of footing or pad. Nail or screw corners together and reinforce with metal strapping to withstand concrete forces.
If using the same formwork multiple times, use strap hinges with a removable pin. Locate screed board in exact position.
Drive Posts into Ground
Drive sharpened 2x4s into the ground around the perimeter of the screed board 6' on center. For pads deeper than 2'-6" reduce spacing to 4'.
If the ground is too hard for 2x4s, drive metal stakes 1-1/2" outside the screed board using an electric hammer. Screw attach 2x4 uprights to each metal stake.
 Lateral bracing is installed on all posts.
 A laser is used to level up the screed board to the top of the footing.
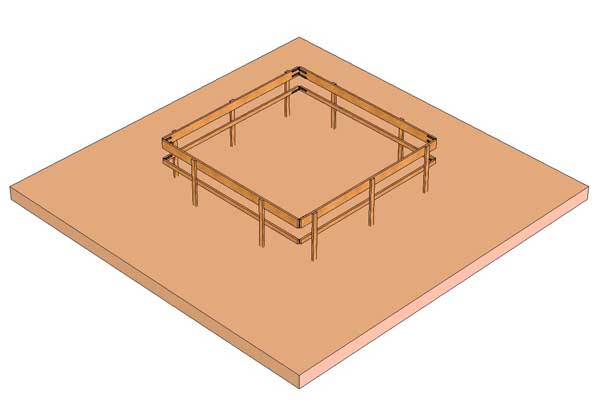 The first rail is installed under the screed board if the distance exceeds 16".
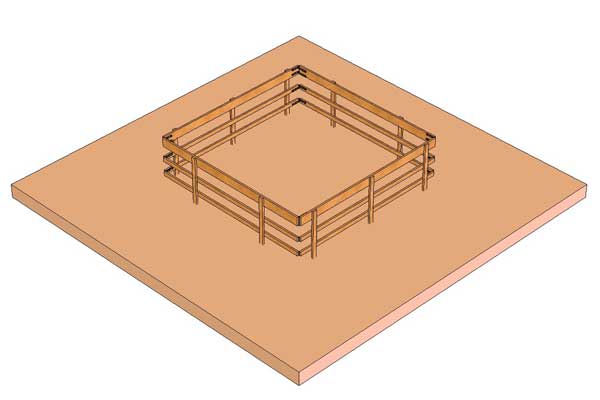 The second rail is installed between the first rail and ground to prevent excessive bulging.
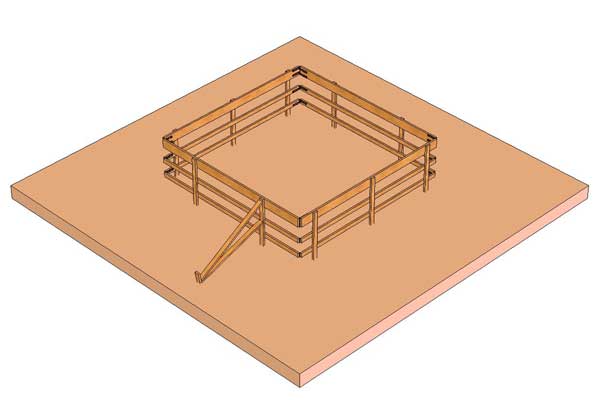 Each post is braced to the ground at the top and at a midpoint.
- Lateral bracing is installed on all posts.
Attach Rails to Posts
Use a laser or builders level to mark footing height on the stakes or uprights. Lift up the screed board perimeter to the footing height and solidly attach with nails or screws.
SOLIDLY attach screed board to each post. Fabric tension wants to torque screed board off post. Use at least four angled nails or two screws per post long enough to penetrate full depth.
If the distance between the ground and bottom of screed board is greater than 16" attach an additional 2x4 or 2x6 rail. This reduces fabric tension and bulging. If two rails are required, reduce the spacing on the lower horizontal member where pressure is higher. Metal-strap or strap-hinge all corners.
Brace Fence Posts
Lateral bracing is critical. Drive stakes into the ground 6-7' outside each post. Run two kickers: one off the top and one off the middle of each post to the ground stake. There is no need to brace bottom of post as these loads are taken by fabric tension.
Form uplift will not occur as fabric tension pulls formwork down.
 Completed pad after lumber has been stripped.
 Fastfoot® is installed around the perimeter of the fence using a hammer tacker.
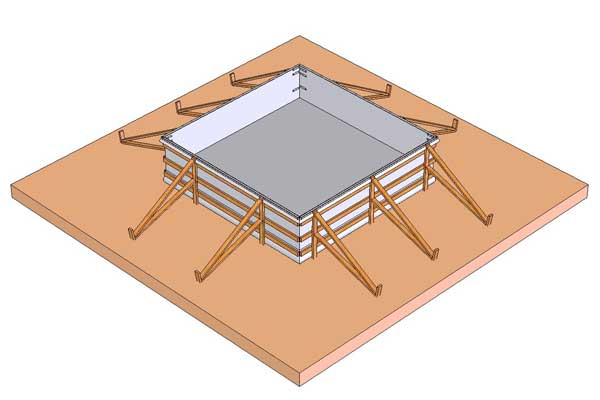 The concrete is poured in 12" lifts to minimize bulging and fabric tension.
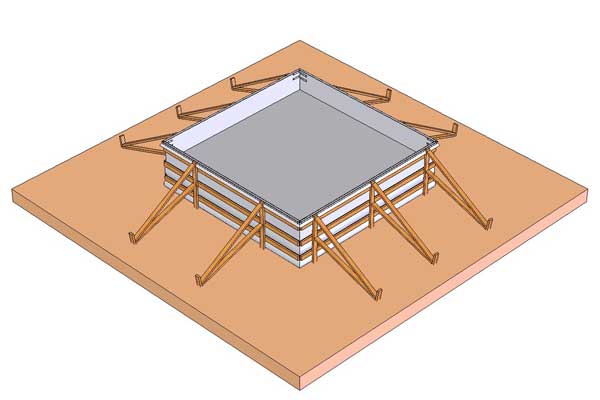 The second lift is placed in the form once the first lift has gone off.
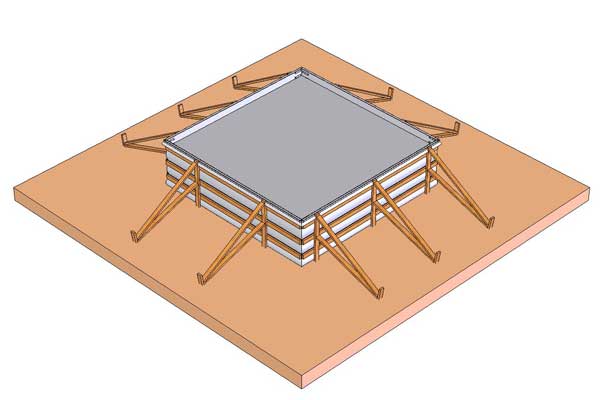 The third lift has now been poured.
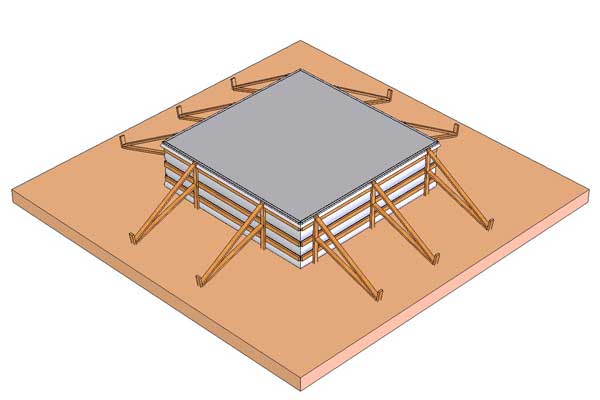 The form has been filled with 42" of concrete.
- Stripping is very fast as no concrete has been in contact with lumber.
Install Fastfoot®
To determine Fastfoot width, add: height of the footing + distance between ground and first horizontal member + 20". Fastfoot is available in three widths: 50", 62" and 74". FF74 rolls can be cut in half with a chop saw to provide a 37" width.
Use a hammer tacker with 3/8" staples. Tension on staples increases as the distance between the screed board and ground (or next rail) increases. Staple at least 2" away from fabric edge as staples can pull through edge. For ease, staple fabric on top of screed board about 2"on center and drive staples flush with fabric. Stapling is all about speed and cadence.
Nail fabric edge to ground 5' on center to lock in place.
To prevent excessive fabric bulging, bring the fabric straight down from the forms and nail fabric edge to prevent movement 3' on center. Fold the corners neatly and nail in place.
Steel installation is done as normal.
Place Concrete
Place concrete along fabric edge on ground to prevent concrete lifting edge. Fill the form evenly around the perimeter and in lifts no more than 12" high. Allow concrete to stiffen before next lift to reduce fabric tension and load on kickers.
